Have you ever ever questioned what the identical deep-space object would seem like utilizing two very totally different telescopes?
I assumed this was an incredible idea for a video (see beneath) and an actual eye-opener for these wanting into upgrading their telescope for astrophotography.
For this experiment, we used two high-quality refractor telescopes that had been very totally different in dimension, and worth.
One telescope prices about $1,000 and is so small that it will possibly slot in your hand, and the opposite one prices practically $10,000 and weighs over 30 kilos.
Earlier than we get into the outcomes, let’s take a better take a look at the deep-sky goal and the gear breakdown.
You can too watch the video of this astrophotography experiment right here:
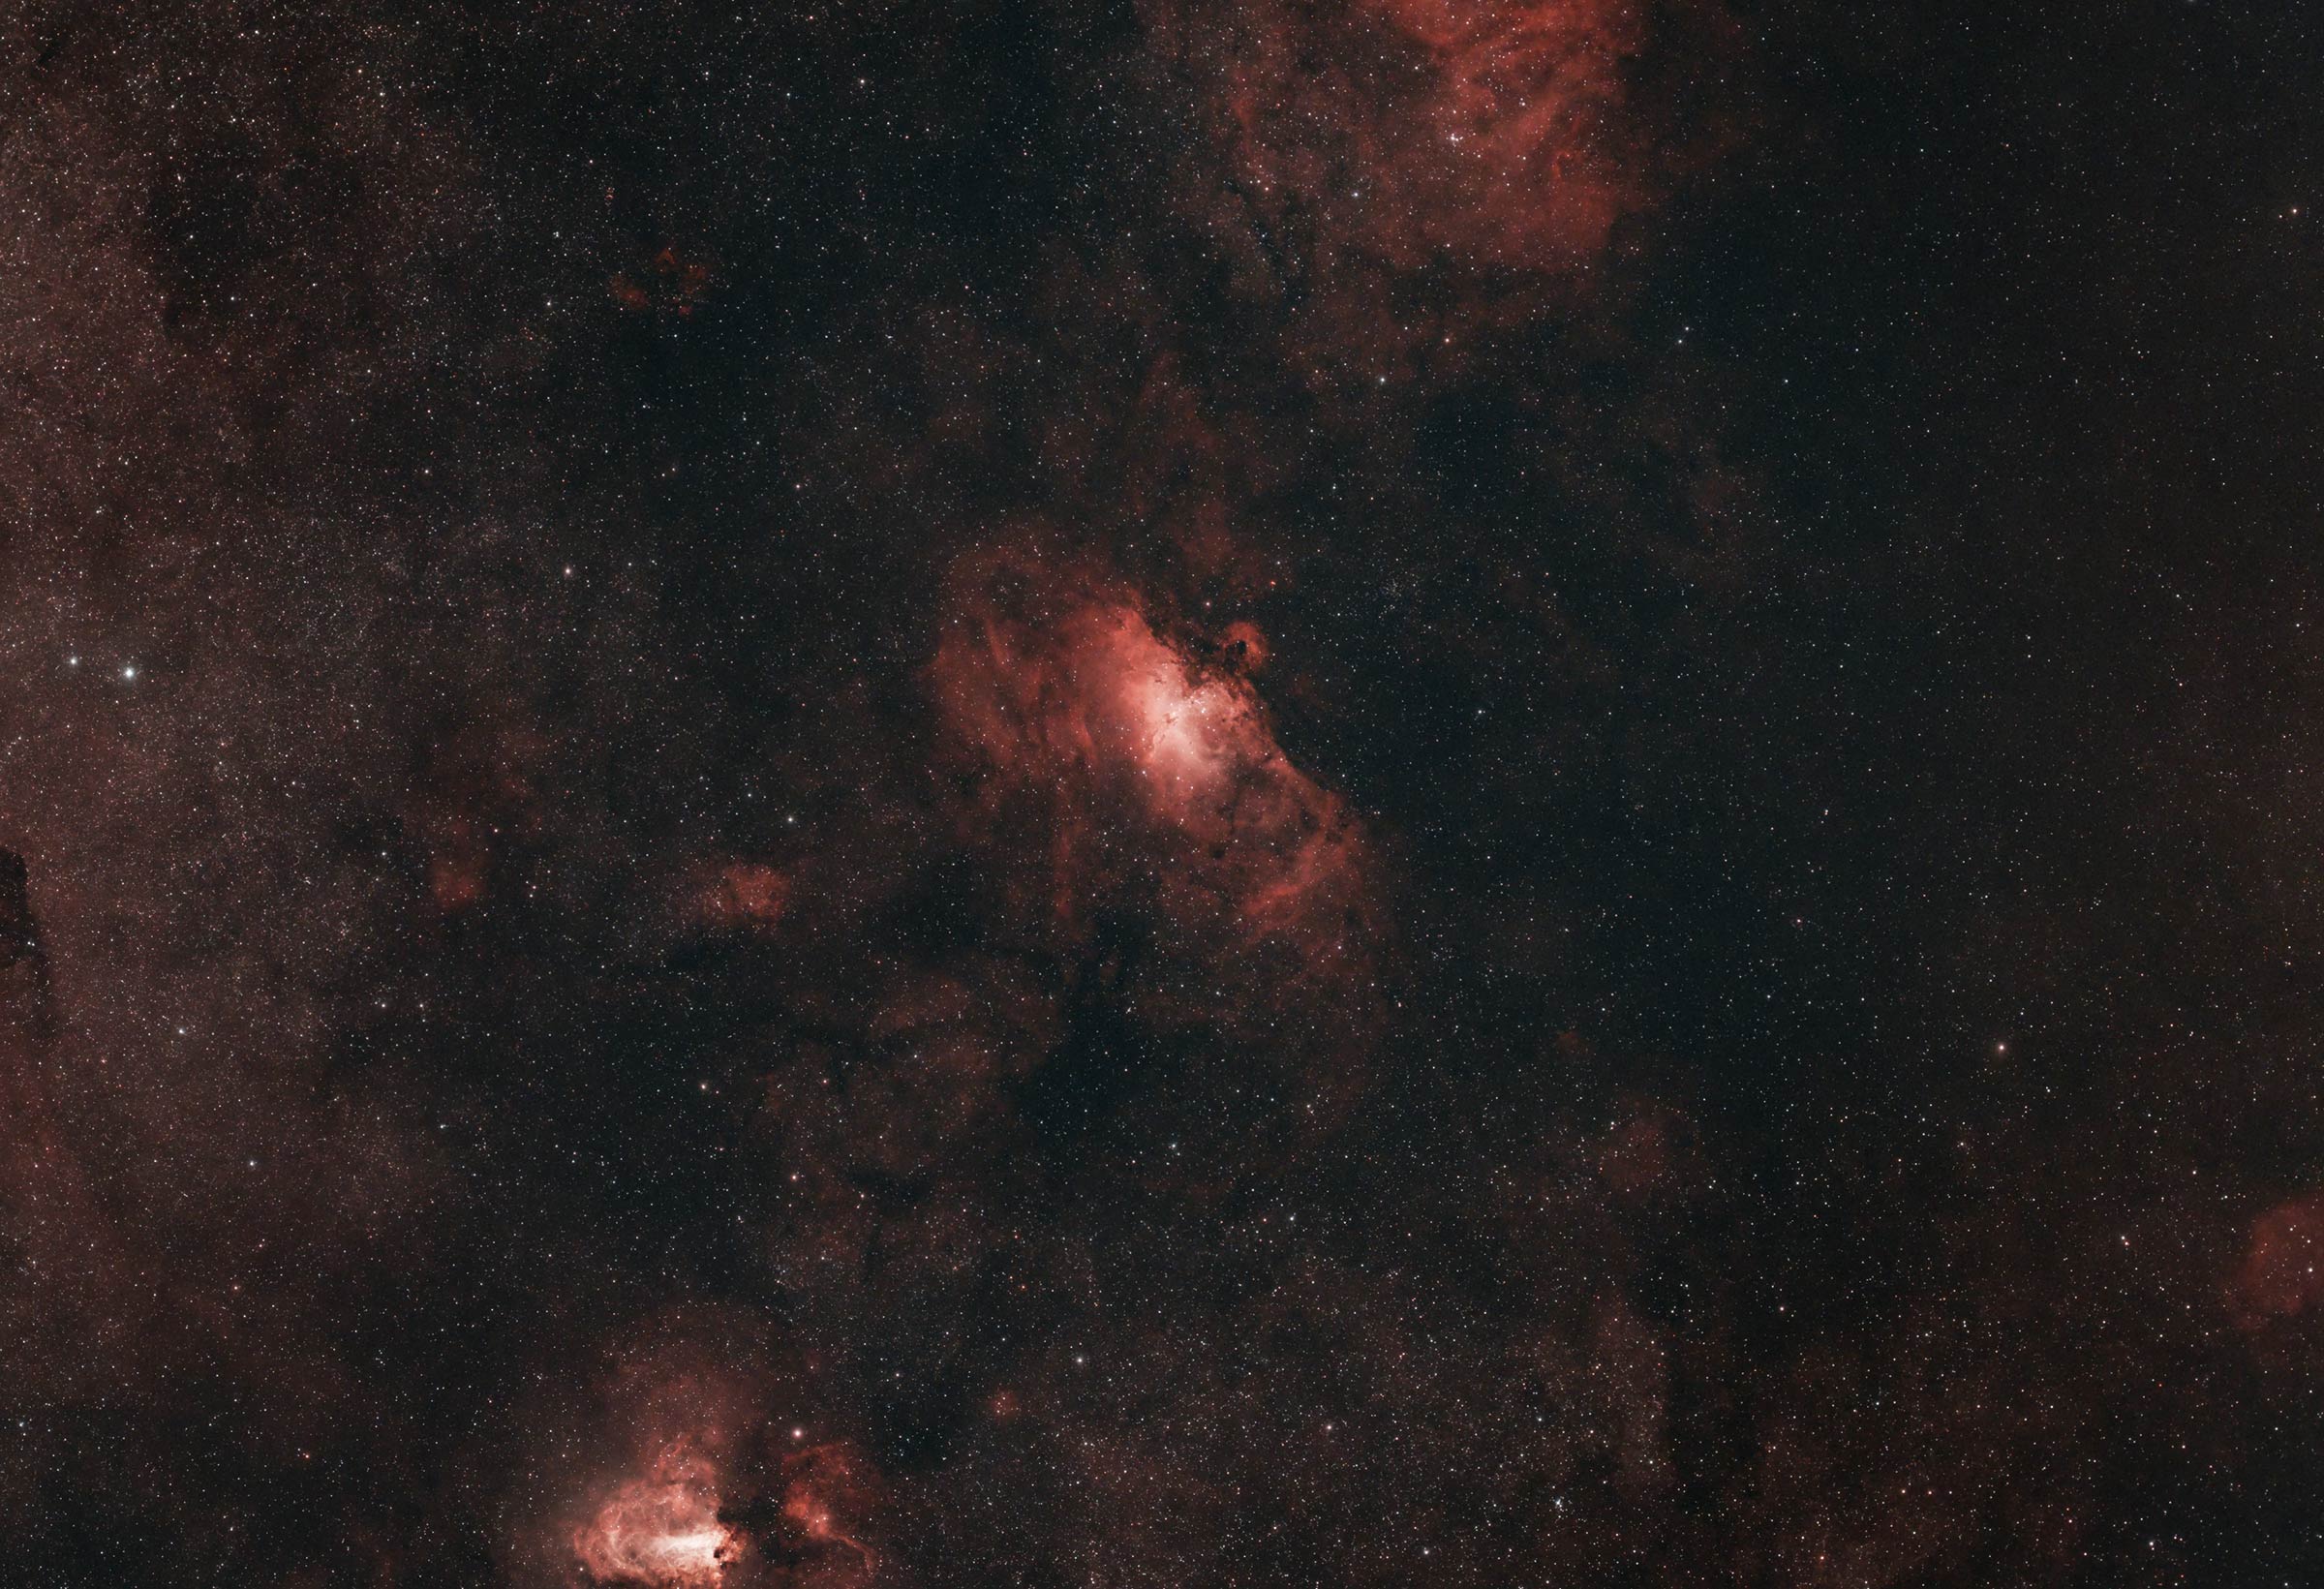
The Deep-Sky Goal
The deep-sky goal chosen was the Eagle Nebula, which is seen within the evening sky proper now (July, August) within the constellation Serpens. It’s huge, it’s vibrant, and it’s 7000 mild years away from Earth.
Often known as Messier 16, this goal is among the brightest nebulae within the evening sky and accommodates the Pillars of Creation, made well-known by the Hubble Area Telescope. The Pillars of Creation seem comparatively small throughout the nebula, however in reality, they’re bigger than our total photo voltaic system.
When you’ve got not but had an opportunity to picture this goal, make sure you examine this one out along with your telescope, irrespective of how huge it’s.

The Eagle Nebula location throughout the Milky Method
The Gear
For the comparability, we ran two full-featured astrophotography rigs on the similar time and tried to maintain the setups as related as doable (i.e. EQ mounts, digital camera controllers, refractor telescopes).
Each setups used devoted astronomy cameras designed for deep-space pictures. Nevertheless, I don’t have two of the identical cameras to make this a real apples-to-apples take a look at, so the cameras are barely totally different fashions.
The telescopes are high-quality refractor designs which can be solely 100 mm aside in dimension. This may occasionally not look like lots when it comes to focal size, however that further aperture makes a giant distinction in astrophotography.
Instead of a laptop computer laptop, we used two ZWO ASIAIR mini PCs to manage the telescopes and automate the imaging session. They management all the things from the digital camera and information digital camera, to the monitoring mount.
Earlier than taking a better take a look at every setup, let’s make clear just a few issues:
- These are simply tough costs for the telescopes (in Canadian {Dollars}). They don’t embody the price of the digital camera, mount, and the entire different telescope equipment.
- You possibly can take a picture simply pretty much as good because the one I took utilizing your personal gear, that value method much less. On no account am I saying it prices $10K to get an image much like my last end result.
Setup #1 – The $1,000 Telescope

As talked about, the cameras are barely totally different. The digital camera featured on this setup shoots in full shade (one-shot shade), that means after an evening of imaging, there will likely be an entire shade picture prepared for processing.
A mild air pollution filter (Optolong L-eNhance) was used to isolate the h-alpha wavelengths and create a punchier picture.
Such a filter is called a multi-bandpass filter. The transmission graph beneath ought to provide you with a greater concept of the selective mild transmission this filter permits via.
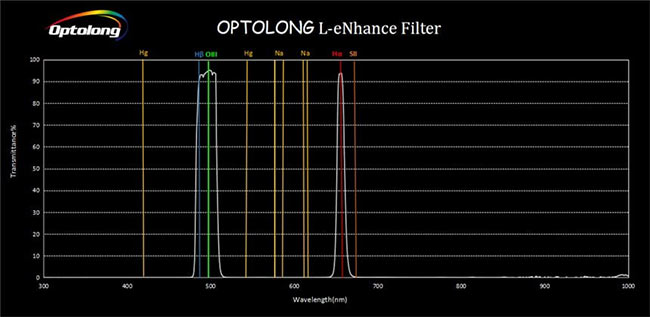
Optolong L-eNhance Filter mild transmission graph.
Issues to Contemplate
This setup is ultra-portable and could be arrange and packed away shortly. The telescope is so mild (simply over 3 kilos), that the mount wanted to run it’s extra inexpensive. You possibly can even run this one on a star tracker which makes it an incredible alternative for travelling.
The disadvantage is that the sphere of view (250mm) goes to be very huge when in comparison with different telescopes. This may occasionally influence a number of the targets you need to {photograph}, as you gained’t have the ability to ‘zoom in’ for a better look or better element on smaller deep-sky objects.
Setup #1 is much more sensible for many yard astrophotographers due to its ease of use, value, and spectacular efficiency.
Setup #2 – The $10,000 Telescope
This setup makes use of a monochrome digital camera with narrowband filters. This implies so as to produce a shade picture, it is advisable to shoot via LRGB filters and construct a shade picture utilizing the photographs from every filter.
Such a astrophotography is called narrowband imaging, and it’s a extra concerned course of than conventional RGB (broadband, true shade) imaging.
An digital filter wheel was used to automate the filter-changing course of, and the suitable filter rotates into place as every new image is taken.

Establishing the 32-pound Sky-Watcher Esprit 150 telescope.
Issues to think about
This setup is a giant monetary and bodily dedication. And regardless that it’s one among my favourite refractors, this can be very heavy and should require a further set of palms that can assist you set it up. Resulting from its dimension, a extra transportable setup could get used extra steadily, particularly if it’s solely going to be clear for just a few hours.
This heavy telescope (over 30 kilos) may also require a critical equatorial mount to function. On this configuration, I’m utilizing a Sky-Watcher CQ350 computerized equatorial mount.
So for anybody desirous about upgrading their telescope for astrophotography, keep in mind that your mount might need to improve together with it which is a further value.
The Session
Each cameras took 4-minute-long footage via their respective telescopes to gather mild on the digital camera sensor. We collected over 6 hours of whole publicity time via every telescope, due to a further clear evening for capturing.
Although we collected the identical period of time on the Eagle Nebula via each telescopes, the bigger setup can have collected extra mild due to a bigger goal lens. This is among the largest variations between the 2 telescopes and what you’re paying the large bucks for.

The large telescope (setup #2) will look deep into the Eagle Nebula to disclose intricate particulars due to light-gathering energy, aperture, greater magnification, and focal size. That is the advantage of the entire further work and price of this explicit setup.
Should you’ve already guessed, the photographs look method totally different via every telescope, because the smaller telescope (setup #1) is capturing at 1 / 4 of the magnification of the large one. This implies the sphere of view is way wider and also you really see different deep-space objects within the sky across the nebula.
The variations within the digital camera sorts and filters used create much more of a separation between the 2 photographs.
The Twist
As talked about, the plan is to seize the identical goal utilizing two totally different rigs. However what I haven’t talked about but, is that the smaller rig (set #1) goes for use by Ashley.
She is acquainted with utilizing the RedCat 51 and obtained it arrange and polar aligned for her imaging sequence. It is a telescope configuration she is comfy with utilizing, whereas the larger system, she just isn’t.
As soon as the entire photographs had been captured, she processed the ultimate calibrated grasp file utilizing Adobe Photoshop (with the assistance of our picture processing information).
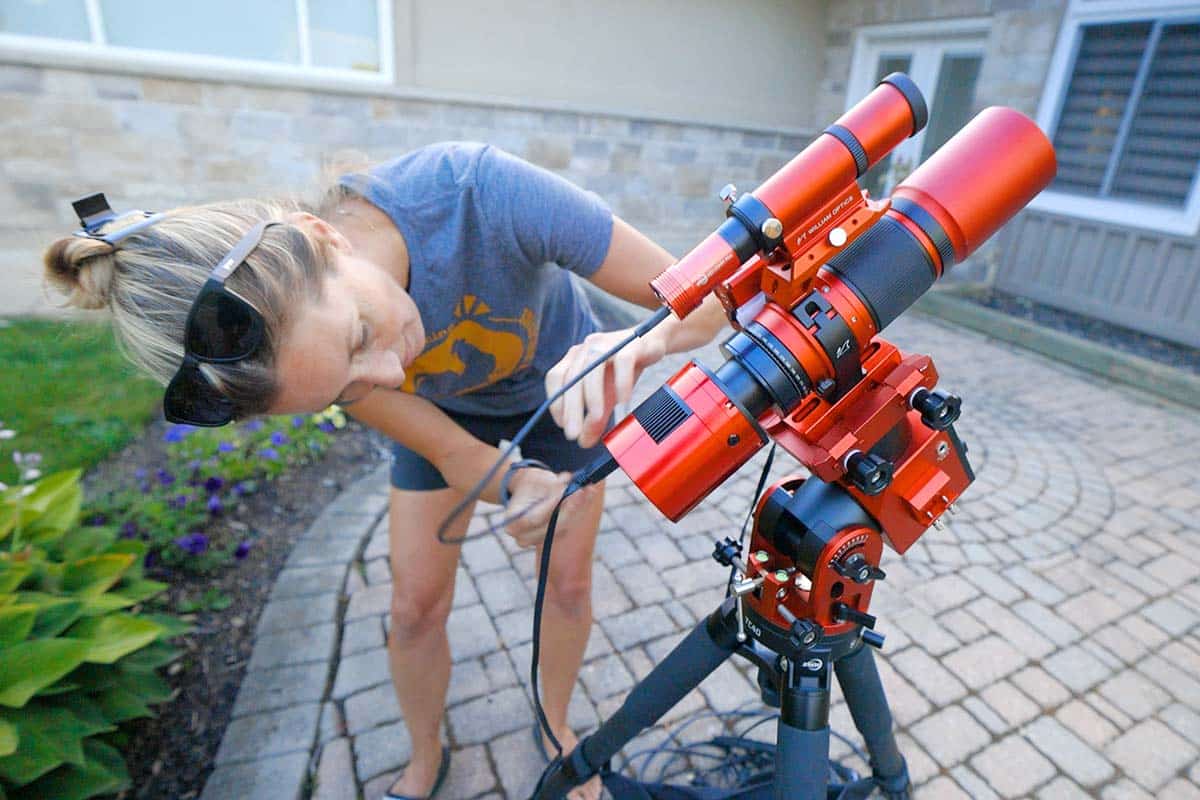
Ashley establishing the RedCat 51 telescope on the ZWO AM5 mount.
The Outcomes
Although we’re evaluating two totally different telescopes that modify drastically in value, you may argue that it is a higher comparability of focal size than worth.
The picture scale between the 2 techniques was considerably totally different, and that had a serious influence on the decision of the ultimate photographs.
And regardless that there are substantial variations within the cameras used, the important thing variations between utilizing a 6-inch refractor telescope and a 51mm telescope, are clear.
The Eagle Nebula utilizing the William Optics RedCat 51 (250mm, RGB).
Picture Particulars
- Whole Publicity: 6 Hours
- Integration: 90 x 240-seconds
- Pre-Processing: Registered and Calibrated in DeepSkyStacker
- Processing: Adobe Photoshop

The Eagle Nebula utilizing the Sky-Watcher Esprit 150 (1050mm, SHO).
Picture Particulars
- Whole Publicity: 6 Hours
- Integration: 30 x 240s Ha, 30 x 240s OIII, 30 x 240s SII
- Pre-Processing: Registered and Calibrated in DeepSkyStacker
- Processing: PixIndight, Adobe Photoshop
Conclusion
Whereas many individuals have targeted on the numerous variations between the 2 setups (apart from value), I nonetheless consider that this comparability is of worth to anybody trying to ‘stage up’ their astrophotography package.
Smaller telescopes usually have shorter focal lengths, and the comparability between the 2 variations of the Eagle Nebula reveals simply how totally different the picture will seem with extra attain.
Moreover, a newbie setup is extra more likely to make the most of a one-shot-color digital camera and light-weight air pollution filter, whereas a bigger one could introduce a monochrome digital camera and narrowband imaging workflow.
As all the time, I hope that this put up has impressed you to proceed your astrophotography journey. Till subsequent time, clear skies!